
Learn how to set up Nginx Ingress on your OVHcloud Managed Kubernetes Service.
Before you begin
This tutorial assumes that you already have a working OVHcloud Managed Kubernetes cluster and some basic knowledge of how to operate it. If you want to know more on those topics, please look at the OVHcloud Managed Kubernetes Service Quickstart.
You also need to have Helm installer on your workstation and your cluster. Please refer to the How to install Helm on OVHcloud Managed Kubernetes Service tutorial.
Ingress resources and Nginx Ingress Controller
In Kubernetes, an Ingress resource allows you to access your Services from outside the cluster. The goal is to avoid creating a Load Balancer per Service but only one per Ingress.
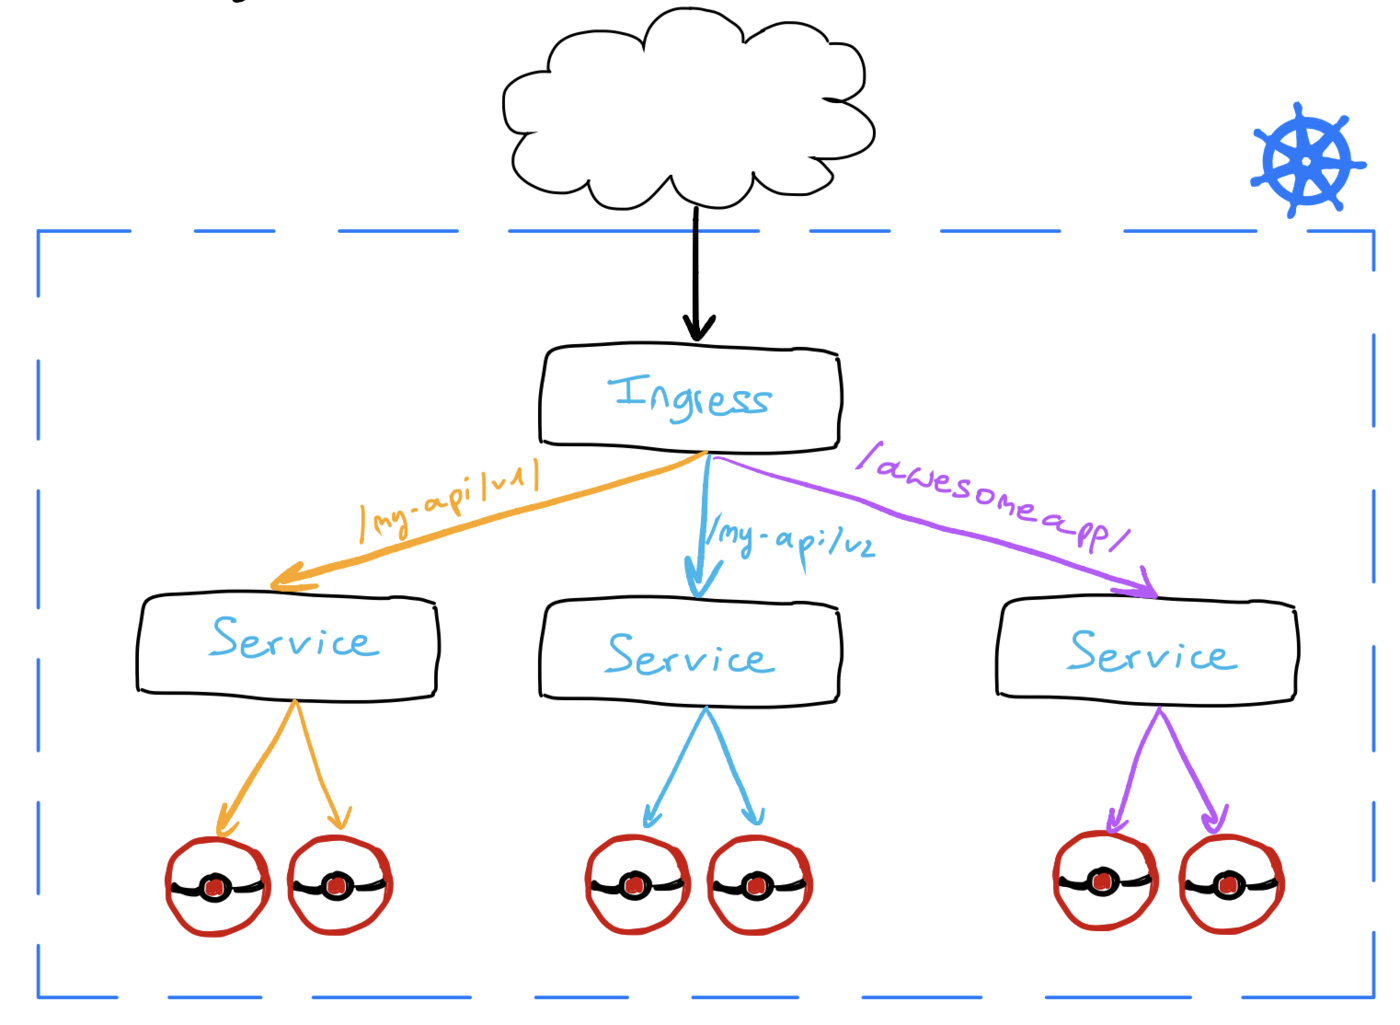
An Ingress is implemented by a 3rd party: an Ingress Controller that extends specs to support additional features.
In this tutorial, you will install an Nginx Ingress Controller.
It is an Ingress controller for Kubernetes using an Nginx web server as a reverse proxy and Load Balancer.
Specifically, when you are deploying and running an Nginx Ingress Controller, you will have a Pod that runs Nginx and watches the Kubernetes Control Plane for new and updated Ingress Resource objects.
Imagine an Ingress Resource as a list of traffic routing rules for backend Services.
After deploying the Nginx Ingress Controller, you will also have an OVHcloud Load Balancer. Thanks to this Load Balancer, the external traffic will be routed to the Ingress Controller Pod running Nginx, which then forwards traffic to the appropriate backend Services you will configure in Ingress resources.
Important: There are two different Ingress controllers for Nginx:
- Nginx Inc Ingress Controller
- Kubernetes Ingress Nginx Controller (the one covered in this guide)
If you opt to install the first controller, please follow the instructions provided in the Nginx Inc Ingress Controller documentation and use the OVH proxy protocol v1 by adding the following annotation to your service:
yaml service: annotations: service.beta.kubernetes.io/ovh-loadbalancer-proxy-protocol: v1
Installing the Nginx Ingress Controller Helm chart
For this tutorial, we are using the Nginx Ingress Controller Helm chart found on its own Helm repository.
The chart is fully configurable, but here we are using the default configuration.
The install process will begin:
At the end of the install, as usual with most Helm charts, you get the configuration information and some tips to test your nginx-ingress:
As the LoadBalancer creation is asynchronous, and the provisioning of the load balancer can take several minutes, you will surely get a <pending> EXTERNAL-IP.
If you try again in a few minutes you should get an EXTERNAL-IP:
You can then access your nginx-ingress at http://[YOUR_LOAD_BALANCER_IP] via HTTP or https://[YOUR_LOAD_BALANCER_IP] via HTTPS.
Enter the following command to retrieve it:
You should have a content like this:
In order to test your nginx-ingress, you can, for example, install a WordPress on your cluster, and then create a YAML file for the Ingress that uses the controller:
Don't forget to replace [YOUR_WORDPRESS_SERVICE_NAME].
In our example, the ingress.yaml produces this result:
Apply the file:
And the Ingress is created.
So now if you point your browser to http://$INGRESS_URL/, you will see your WordPress:

Go further
For more information and tutorials, please see our other Managed Kubernetes or Platform as a Service guides. You can also explore the guides for other OVHcloud products and services.
If you need training or technical assistance to implement our solutions, contact your sales representative or click on this link to get a quote and ask our Professional Services experts for a custom analysis of your project.